Using Logto As Authentication System
0. Installation and Preparation
Logto provides interfaces and APIs for user login, registration, and permission verification.
It is recommended to install Logto using Docker. See https://docs.logto.io/docs/tutorials/get-started/#local.
Once installed, you can generally access the Logto admin console via http://127.0.0.1:3002.
Logto application runs at http://127.0.0.1:3001, referred to as LOGTO_ENDPOINT below.
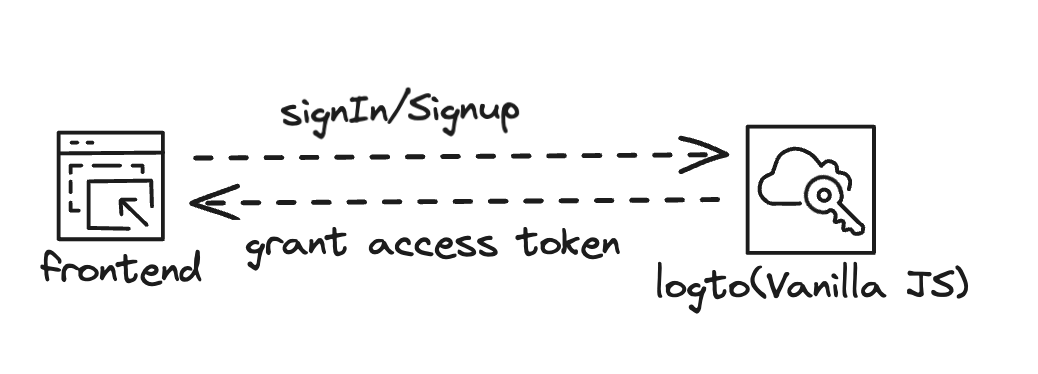
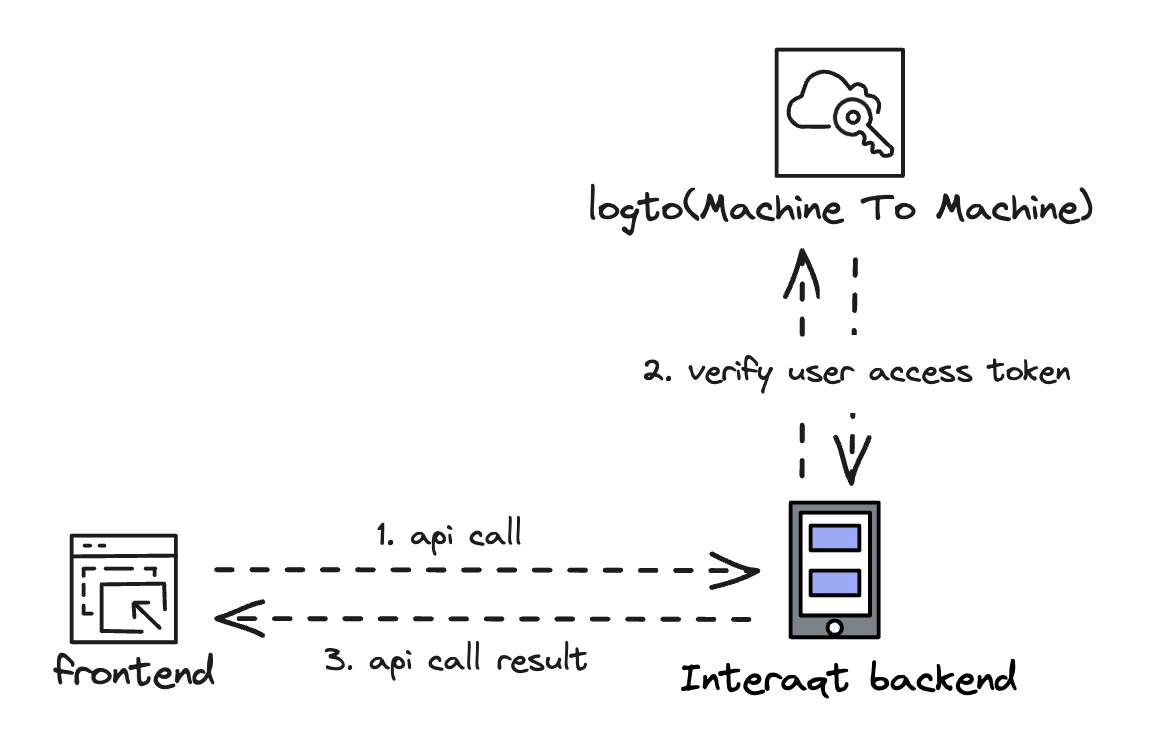
The relationship between Interaqt application and Logto is illustrated below.
Registration and Login:
API 调用:
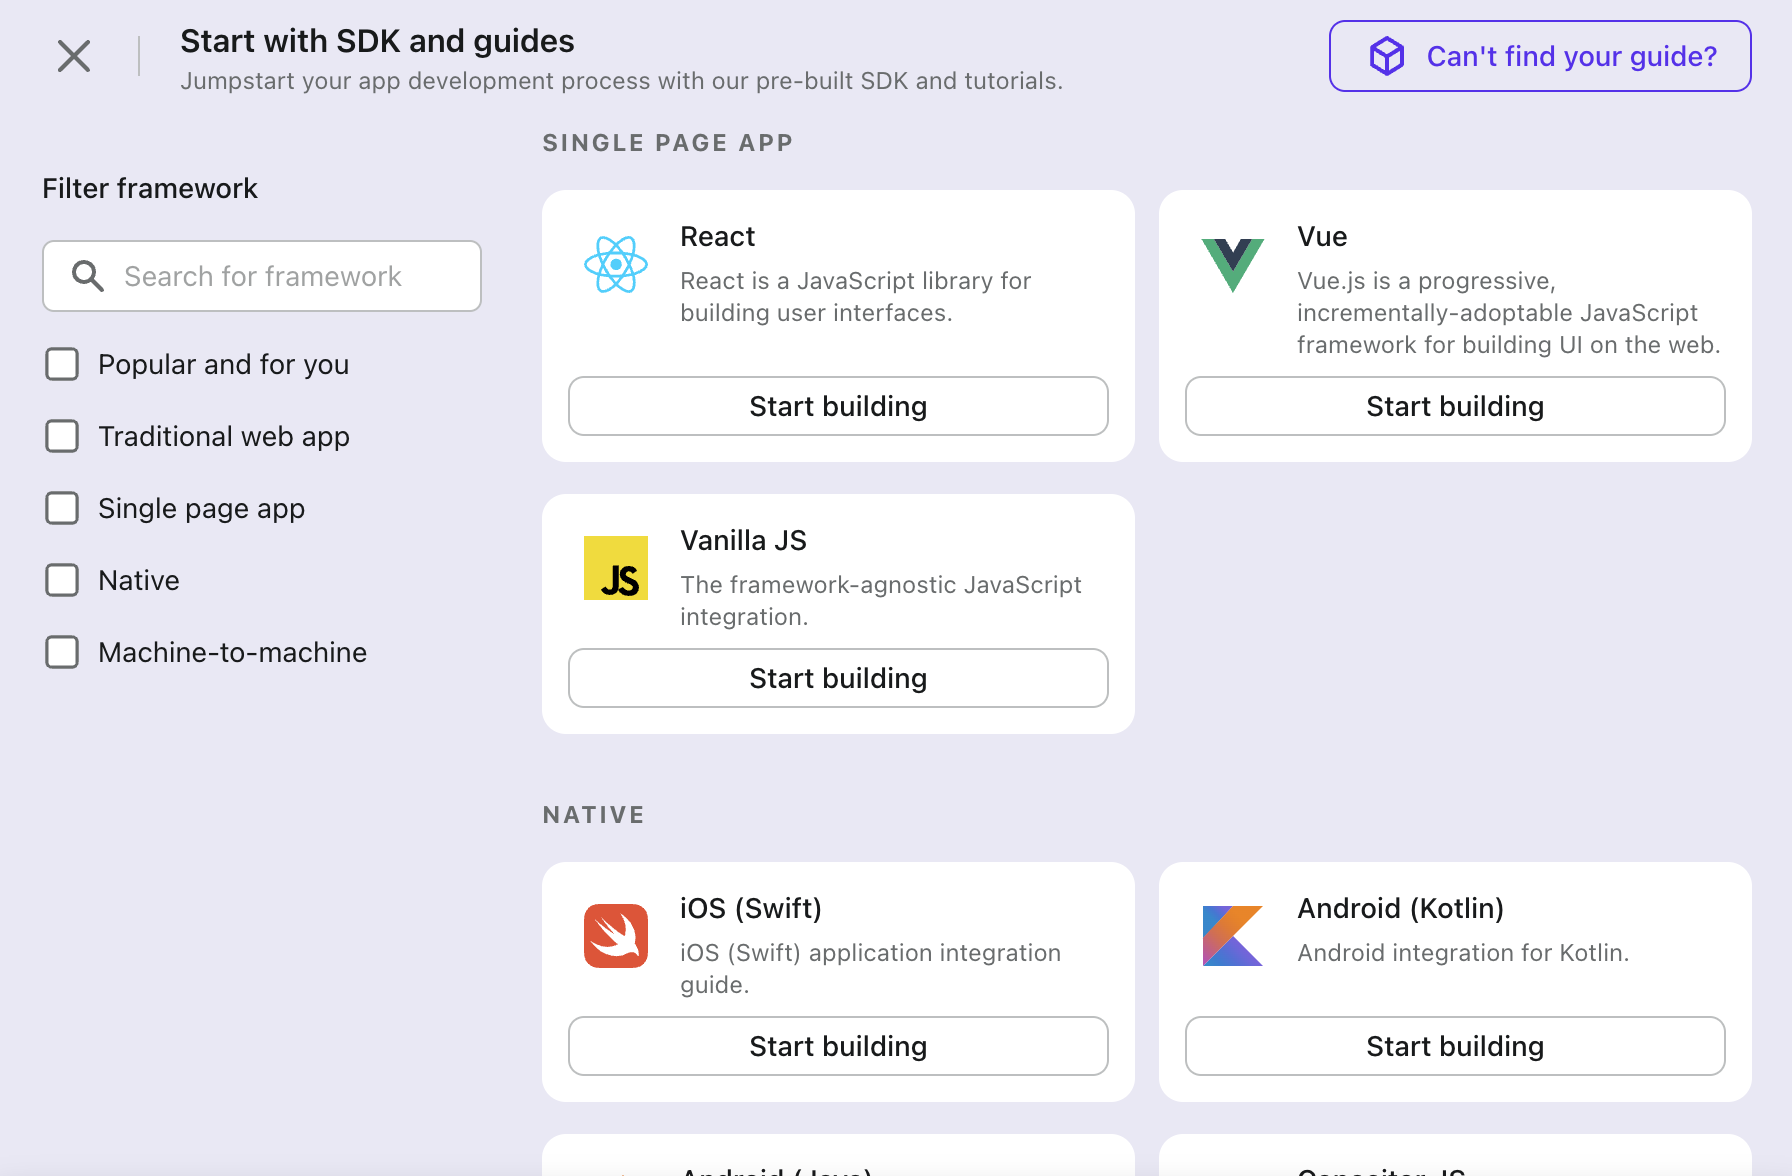
1. Create a Vanilla JS Application in Logto
Create an application in Logto, select vanilla js, and obtain an app_id. This application is used for frontend handling of user login and registration. In the following code, the login redirection logic handled by the frontend uses this Vanilla JS application's app_id.
2. Create a Machine to Machine Application in Logto
This application is used for Interaqt to sync user data from Logto and for API authentication.
In the following code, the authentication logic handled by the backend uses the app_id and app_secret of this Machine to Machine application.

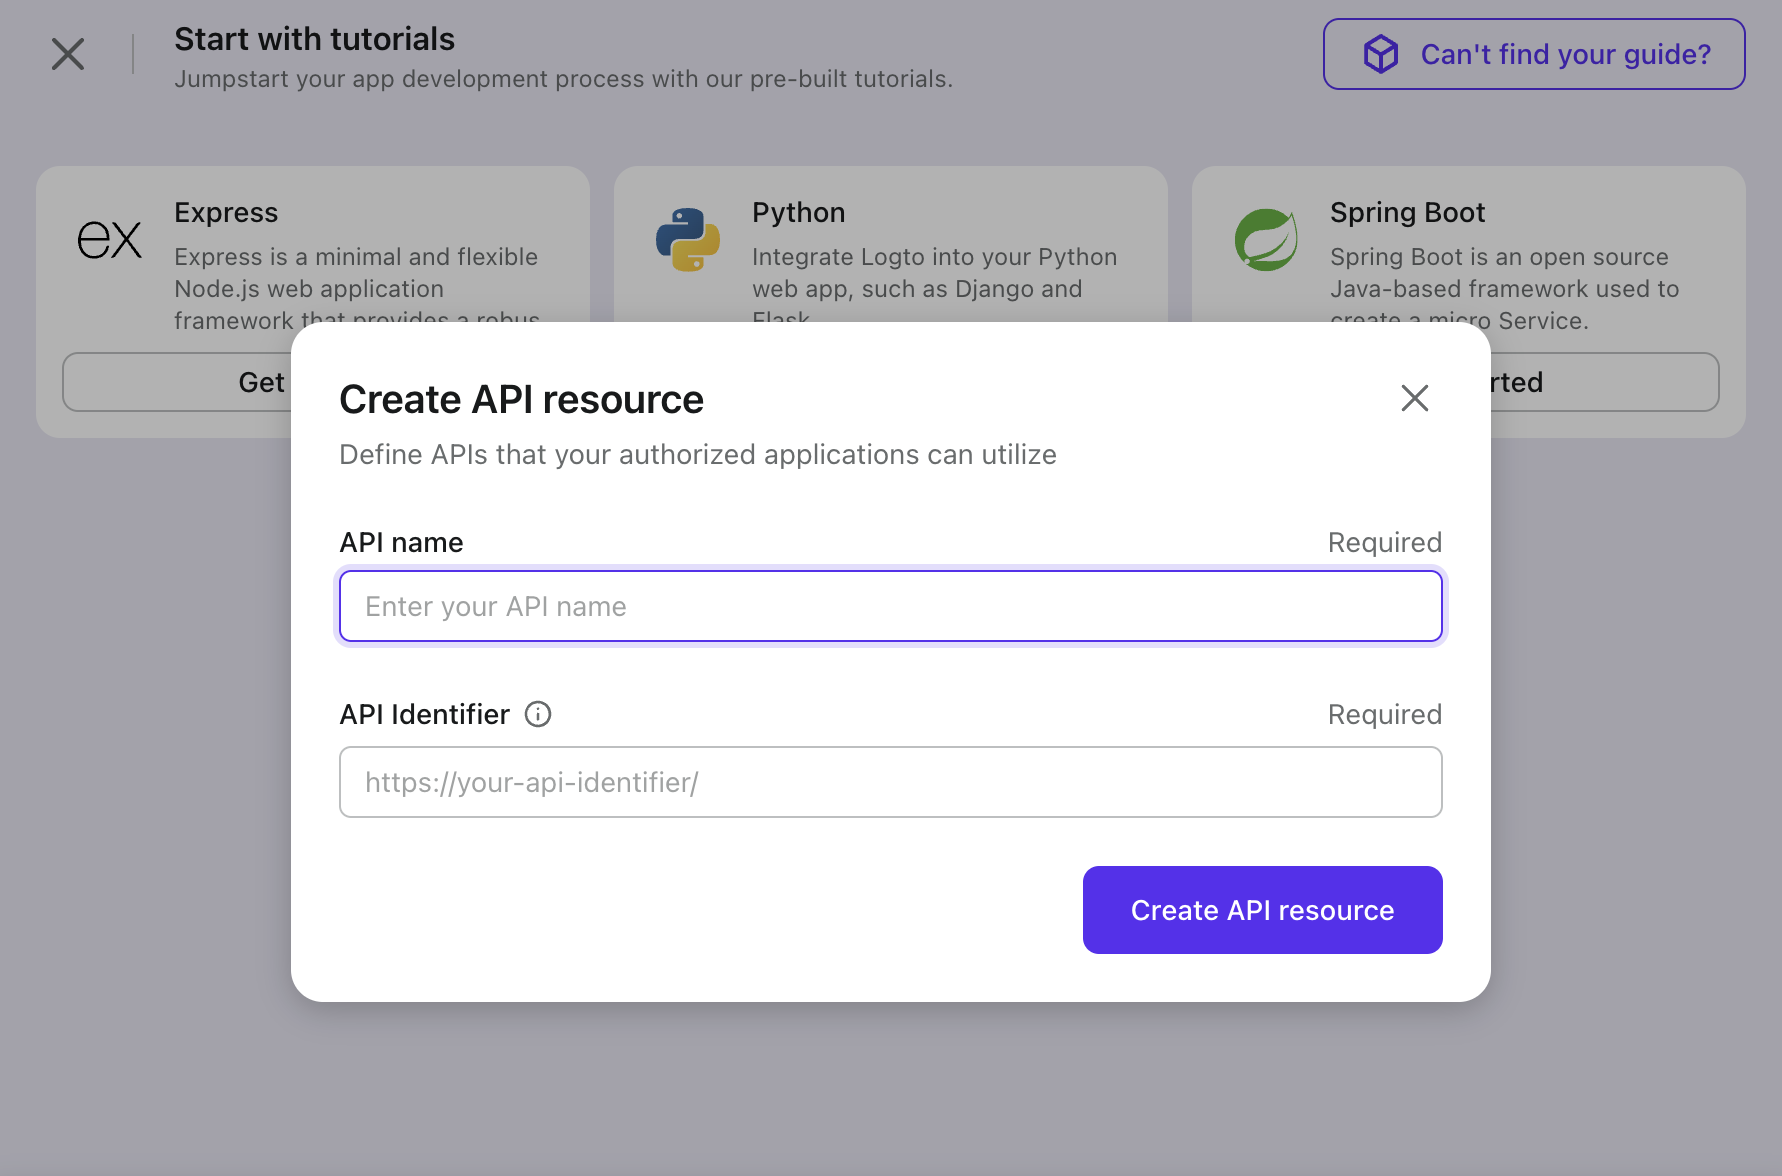
3. Create an API Resource in Logto
Used for protecting API calls.
4. Configure Logto New Account Webhook
Allow Logto to automatically sync new user information to Interaqt when a new user registers.
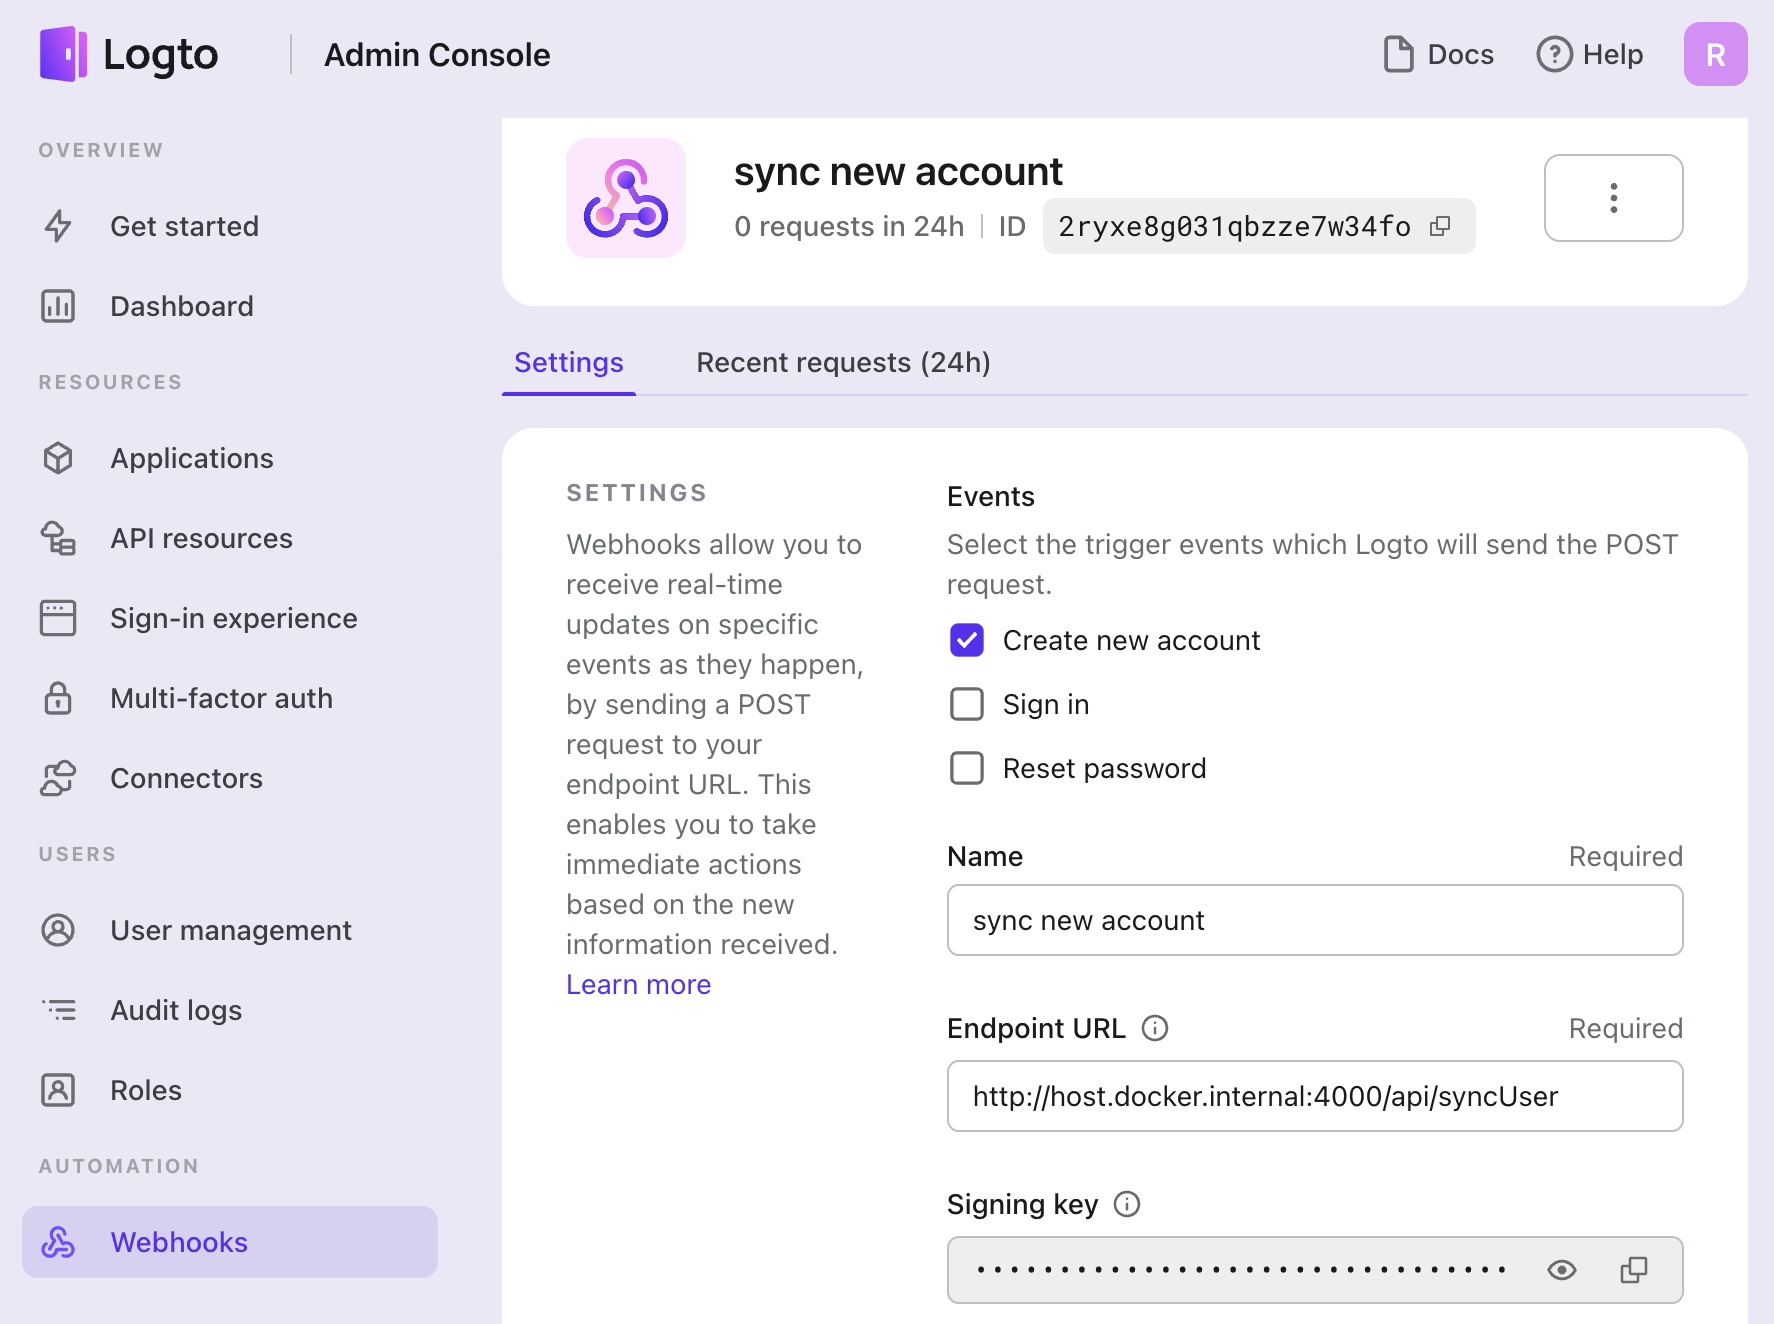
Note, if you started Logto in Docker, you need to replace localhost with host.docker.internal.
This completes all the Logto configurations.
5. Create /api/syncUser Endpoint in server.ts
Use Interaqt's custom API to create the /api/syncUser endpoint, which is used to receive webhook requests and sync user information from Logto to Interaqt. Refer to https://docs.logto.io/docs/recipes/webhooks/webhook-request/ for webhook field information.
const apis = {
    syncUser: createDataAPI(function syncUser(this: Controller, context: DataAPIContext, body: any) {
        return this.system.storage.create('User', {id: body.user.id, name: body.user.username})
    }, {allowAnonymous:true, useNamedParams: true})
}

startServer(controller, {
    port: 3000,
    parseUserId: async (headers: IncomingHttpHeaders) => {
        // ...
    }
}, apis)
6. Determine User Login Status in Frontend Using @interaqt/utility
Use the SDK wrapped in @interaqt/utility to determine the user's login status in the frontend.
Note that the APP_ID used here is from the Vanilla JS application created above.
import {Client} from '@interaqt/utility/browser.js'
export const client = new Client(LOGTO_ENDPOINT, VANILLA_JS_APP_ID, INTERAQT_ENDPOINT)

if (await client.client.isAuthenticated()) {
    window.location.href = 'http://localhost:5173/app.html' // your frontend main entrance
} else {
    client.client.signIn('http://localhost:5173/app.html') // signIn success callback
}
7. Use API Functions Provided by @interaqt/utility to Initiate Interaqt API Requests
Interaqt has already encapsulated a post function in @interaqt/utility that automatically attaches the access token. In the frontend, you just need to call it.
Note that the APP_ID used here is from the Vanilla JS application created above.。
import {Client} from '@interaqt/utility/browser.js'
export const client = new Client(
    LOGTO_ENDPOINT,  // usually http://127.0.0.1:3001
    VANILLA_JS_APP_ID,   // your logto vanilla js app id
    INTERAQT_ENDPOINT // usually http://127.0.0.1:4000
)

const result = await client.post('/interaction/sendFriendRequest', {})
8. Use API Provided by @interaqt/utility in Interaqt server.ts for API Authentication
Use @interaqt/utility in server.ts as well. Note that the APP_ID and APP_SECRET used here are from the Machine to Machine application created above.
import { Client } from '@interaqt/utility/server.js'
const client = new Client(
    LOGTO_ENDPOINT,    // usually http://127.0.0.1:3001
    MACHINE_TO_MACHINE_APP_ID,    // your logto machine to machine app id
    MACHINE_TO_MACHINE_APP_SECRET,    // your logto machine to machine app secret, check your logto admin console
    INTERAQT_ENDPOINT    // usually http://127.0.0.1:4000
)

startServer(controller, {
    port: 3000,
    parseUserId: async (headers: IncomingHttpHeaders) => {
        return (await client.verifyJWTForAPI(headers)).sub
    }
})