Get Started
Step 1: Installation
npx create-interaqt-app myapp
cd myapp
Upon entering the newly created application directory, you will encounter the following directory structure:
├── app
│    └── index.ts
├── dashboard
├── data.ts
├── database.db
├── install.ts
├── package.json
├── server.ts
└── // Other files
Where:
- The app directory contains the definition of your entire application.
- dashboard is an optional application management interface.
- data.ts contains your initial data.
- database.db is your SQLite database file.
- install.ts is a script for initializing the database.
- server.ts is a script for starting the application.
Step 2: start the project and dashboard
npm run dev
Open a new console and enter the myapp directory.
cd dashboard
npm start
Your application is now running at http://localhost:4000 by default. Your dashboard is now running at http://localhost:5173 by default.
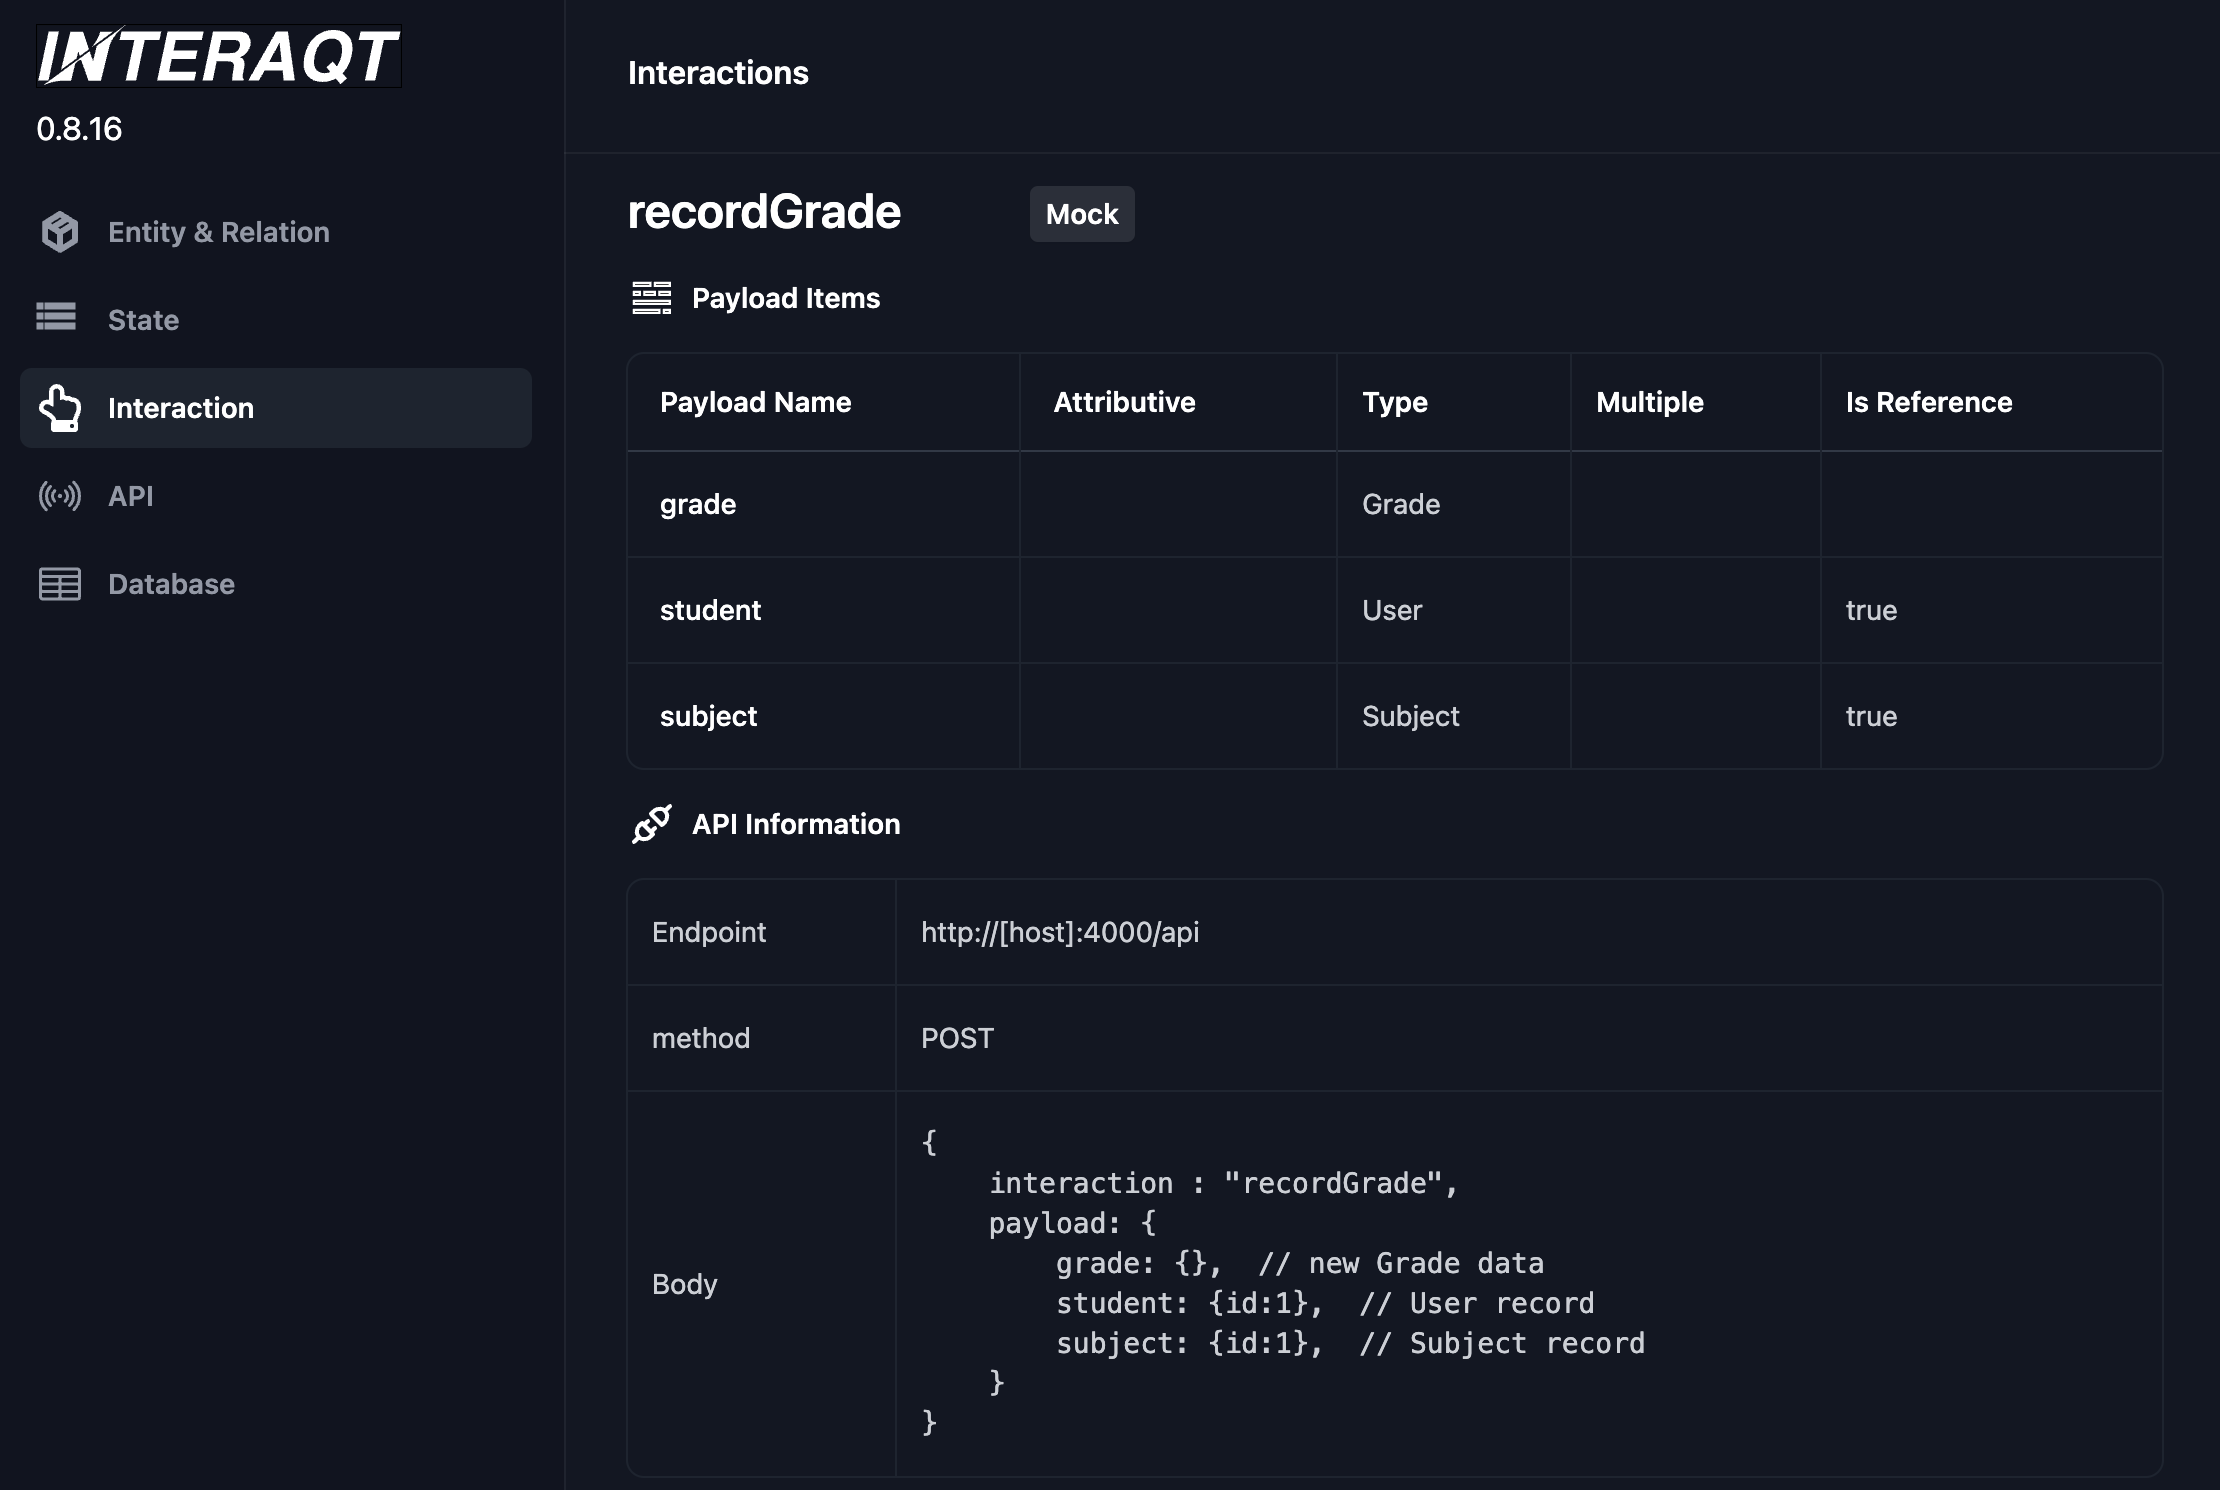
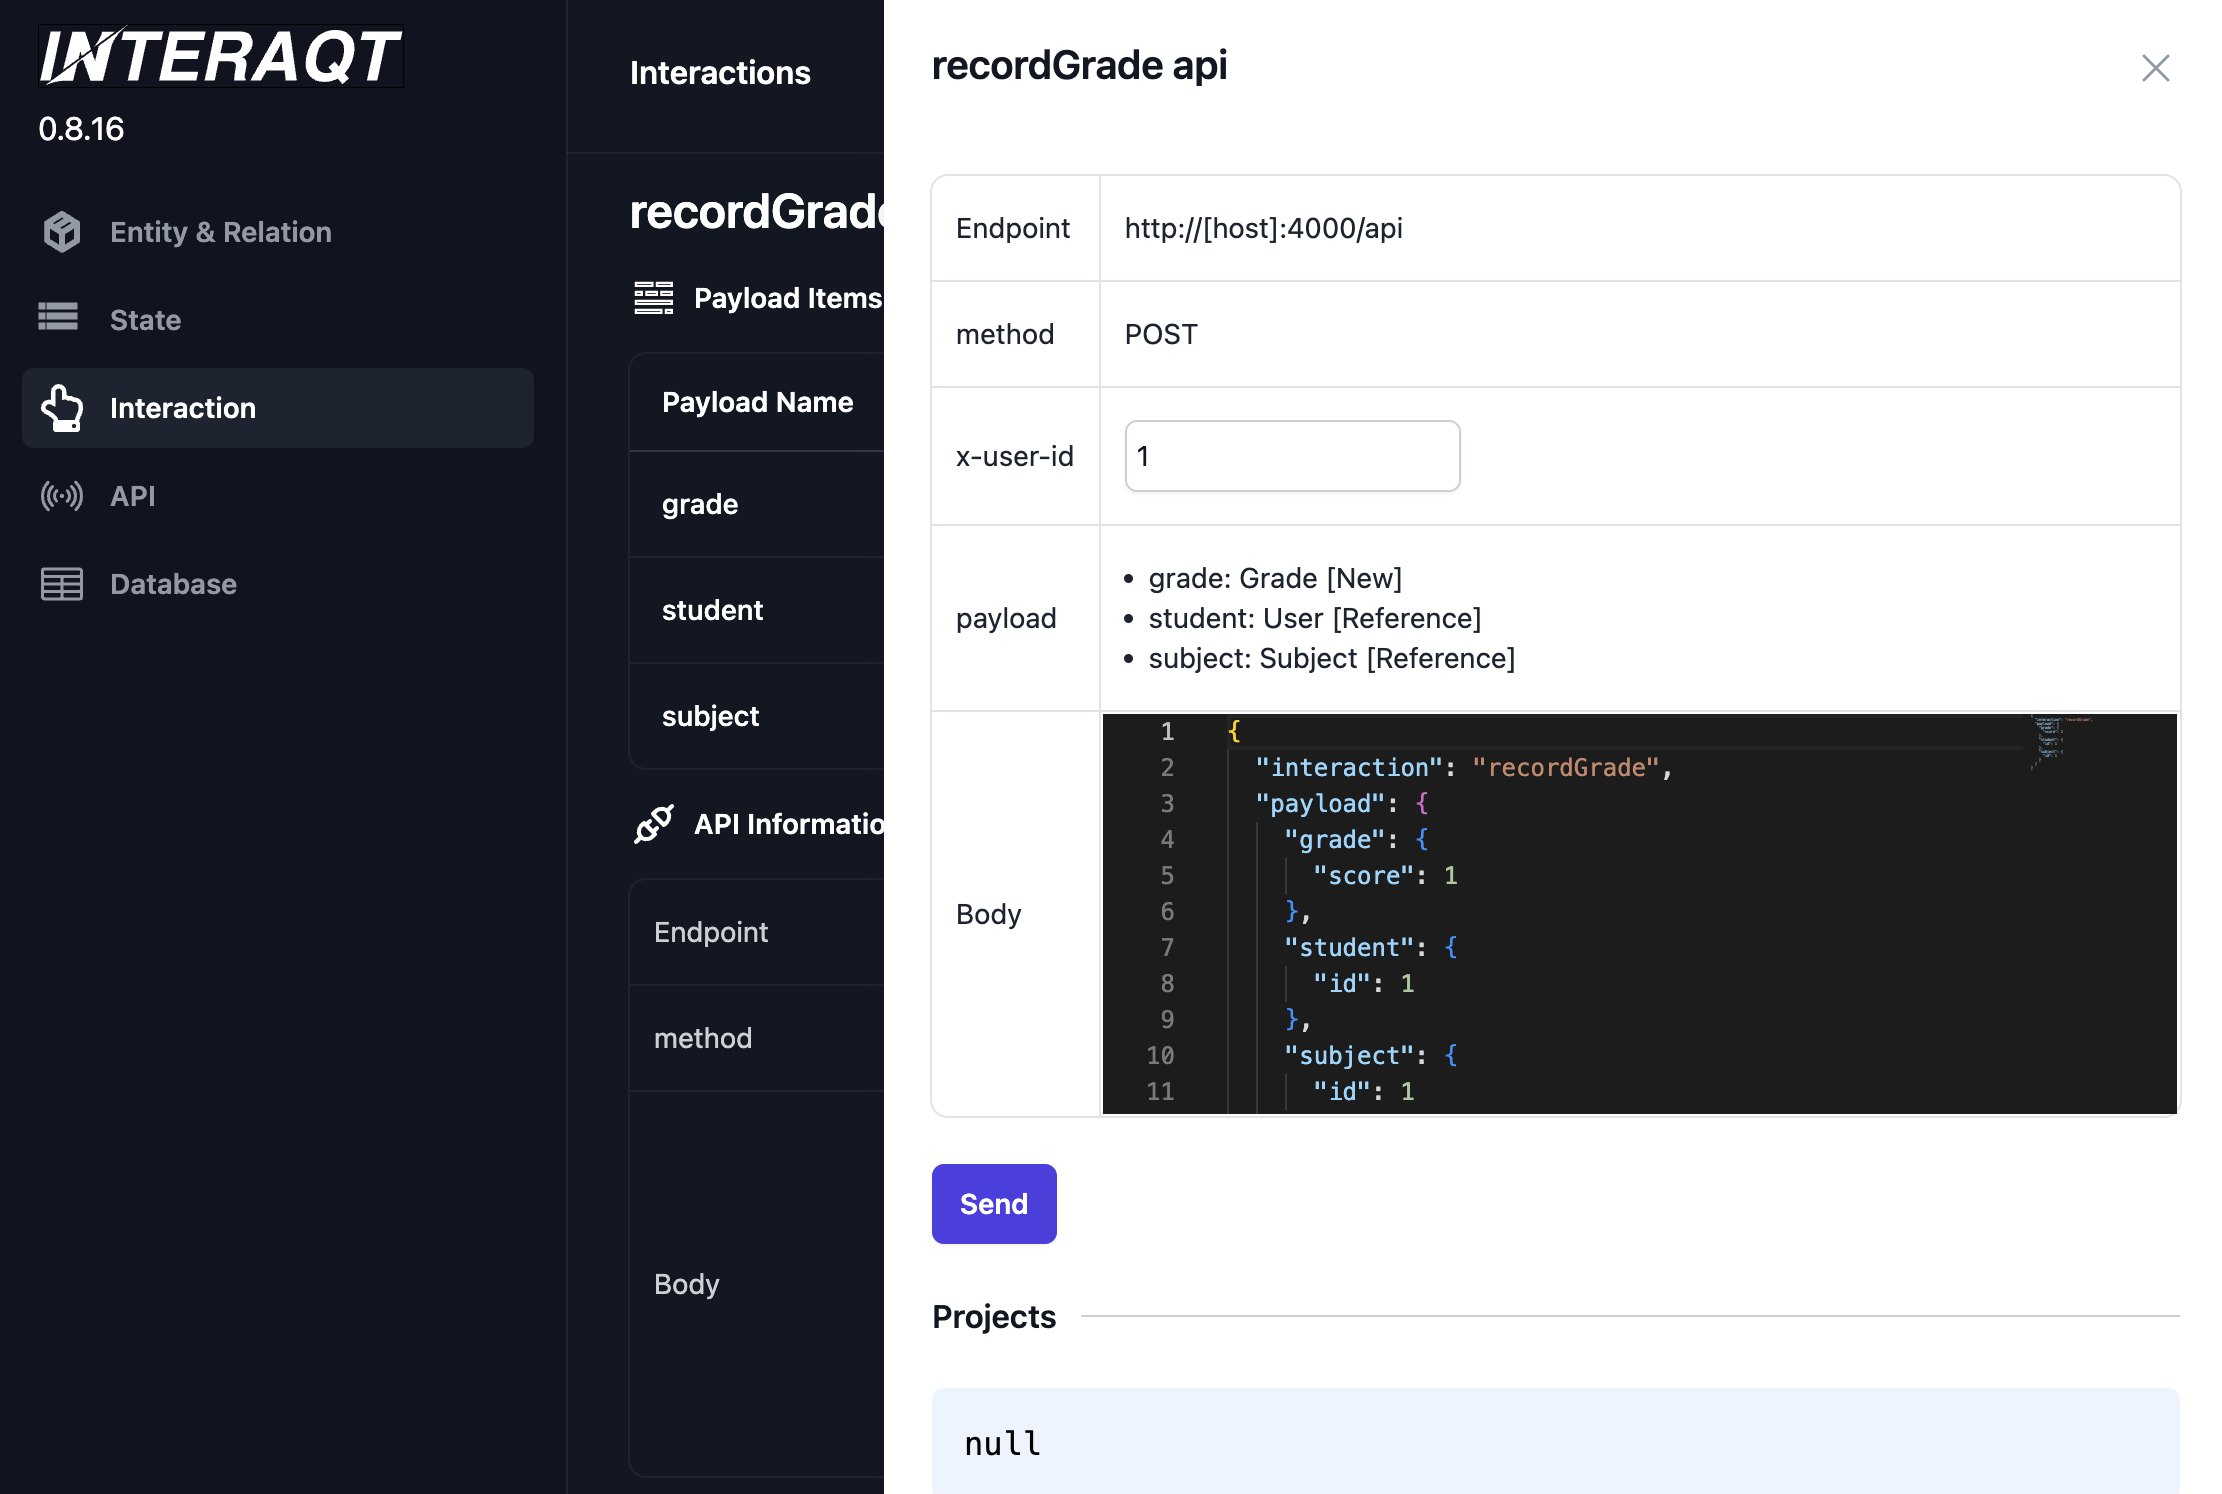
You can view all the entities, relationships, interactions, and other information within the system from the dashboard. You can also create data and simulate user interactions through the dashboard.
The /examples directory contains many ready-to-use examples. You can copy the contents from there into /app/index.ts to test them.